How to Import to Akolades
Convert Your Revit Project to an Akolades Project with Quotes and Pricing
- Overview
- Populate your Schedule by Adding Mark & Area
- Export Schedule From Revit
- Upload Your Schedule to Akolades
- Attach Documents to Project
- Adjust Quotes in Akolades
Overview
Your Revit project can be exported to Akolades to create projects with indiviudal quotes with pricing. These quotes can be submitted as order. Click the links below to navitage to a specific step, or use the 'Next' on the bottom right of the screen to read sequentially.
Here's an overview of the process:
Step 1: Create a Schedule within your Revit Project
Step 2: Export Schedule From Revit
Step 3: Upload Your Schedule to Akolades
Step 4: Create Project in Akolades using a Revit Schedule
Step 5: Attach Documents
Step 6: Adjust Quotes in Akolades
Populate your Schedule by Adding Mark & Area
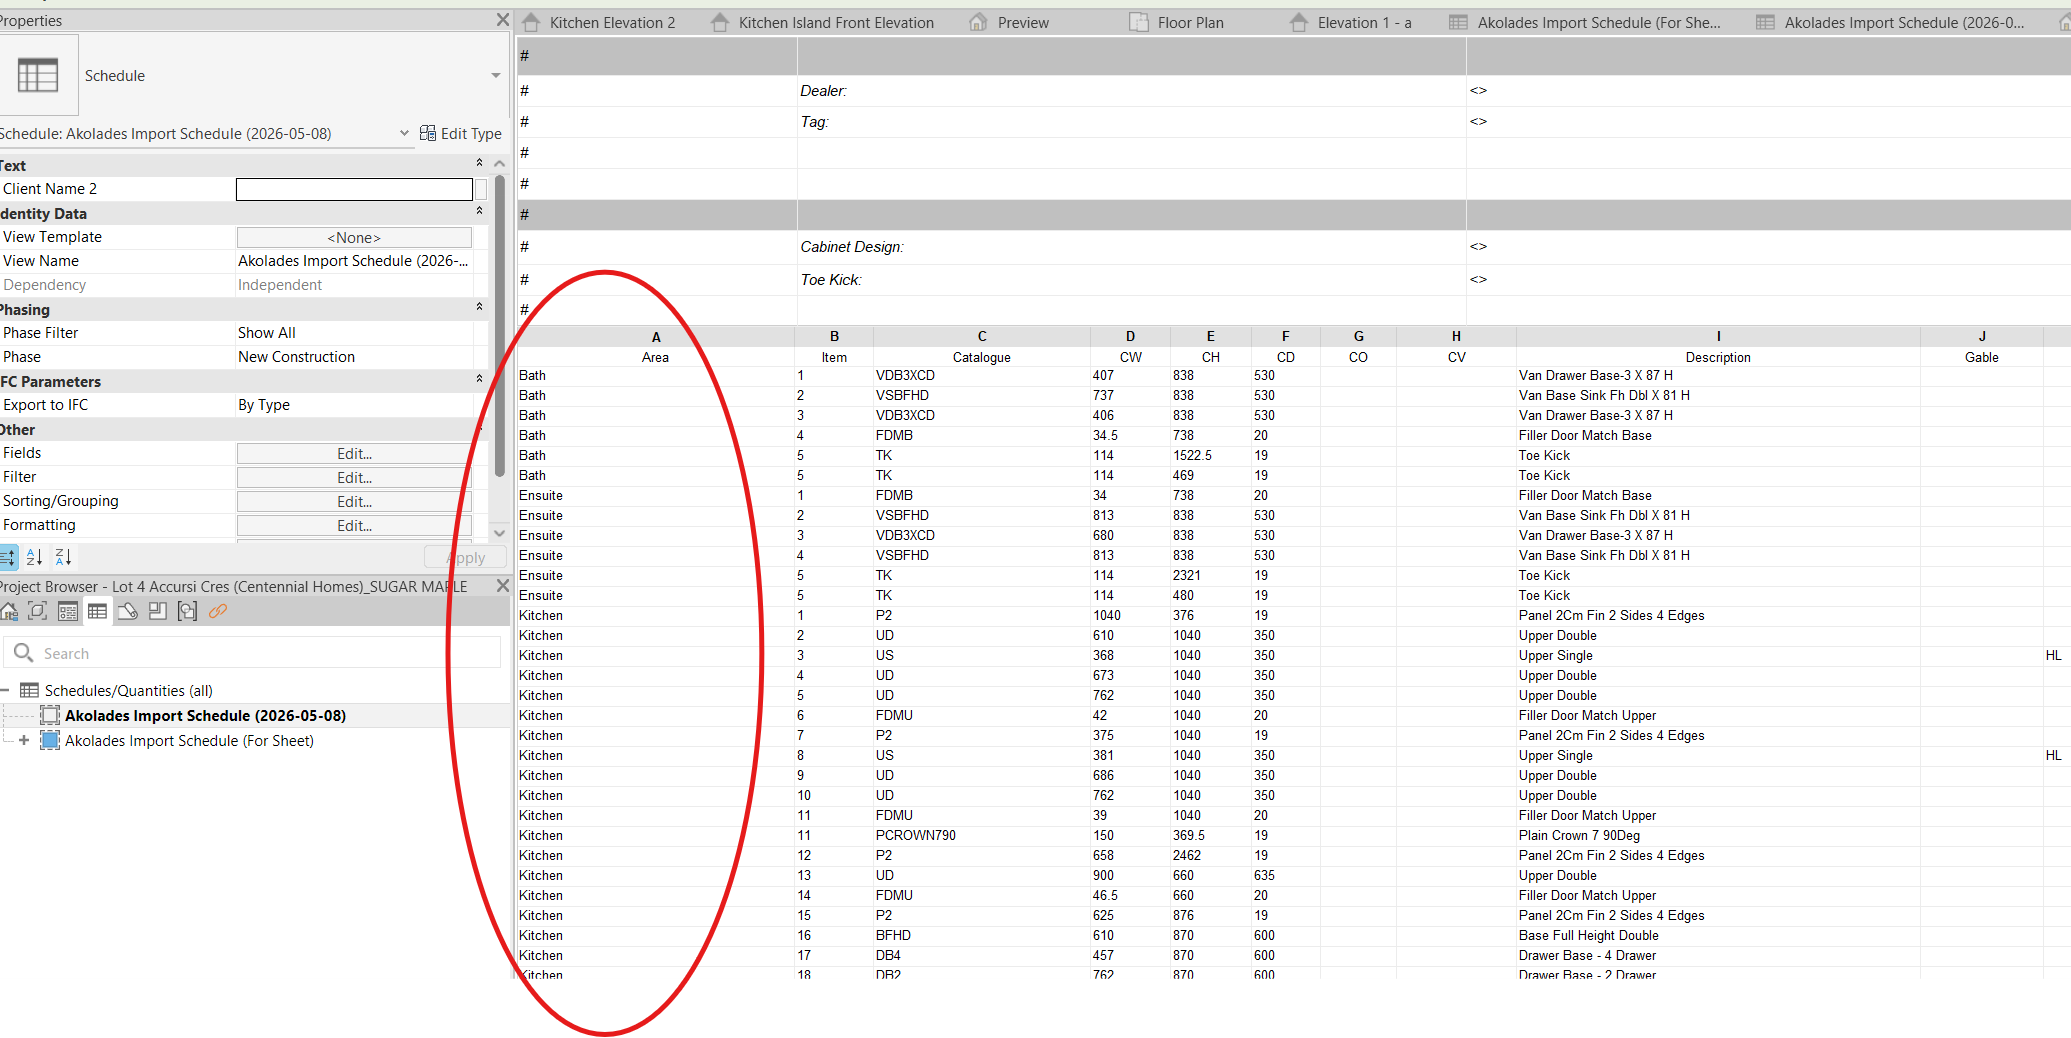
An Artcraft order is essentially a listing of the items for purchase and manufacturing that appear on the layout drawings, either on plan view, but most often now on each elevation. A properly written order has each item corresponding to each item on the drawing. Now that we are drawing in Revit, it's important to continue this tradition. Itemizing your drawing in Revit is done by manually setting a series of item numbers, or Marks (in Revit speak) for each of the areas you want to differentiate. Each area will become a separate quote within the project once the schedule, created from your project drawing is imported into Akolades. For example, your project may contain 2 areas, say a kitchen perimeter and an island that differ enough that you want to price and order in different quotes. To do this, each item in your drawing needs to be assigned and itemized to one of the areas.
Your Artcraft Template includes the correct Schedule to upload your project to Akolades. You need to populate that Schedule by assigning a Mark and an Area to each item in your project.
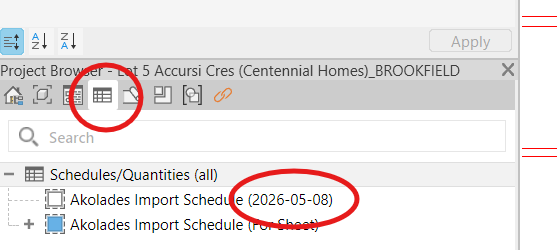
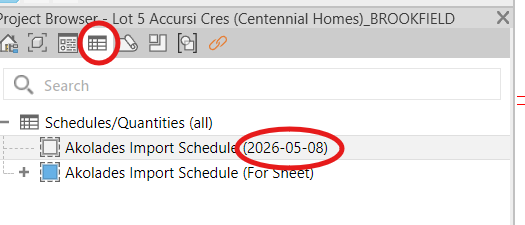
You can see all your schedules by clicking the 'Schedule' tab in your Project Browser.
Ensure that you have the latest schedule by checking the date -- it should match the date that appears on the downloads page.
Marks
Your Artcraft Template includes Mark families for Circle, Octagon, Square and Triangle. Think of the shape as a window showing you the Mark that is assigned to your family. Revit and Akolades do not read the shape.
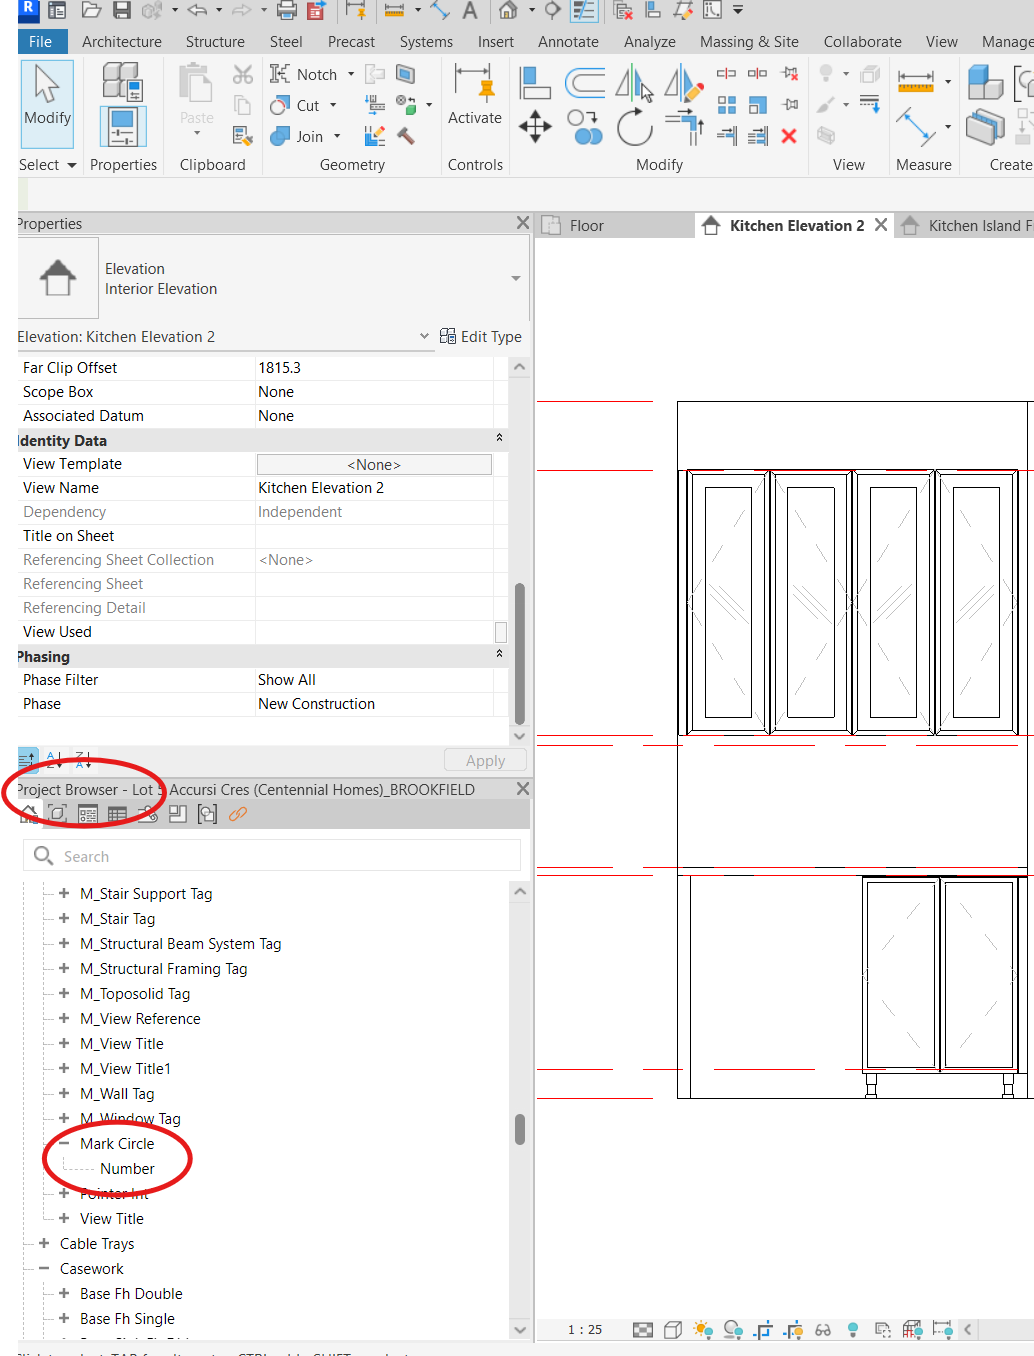
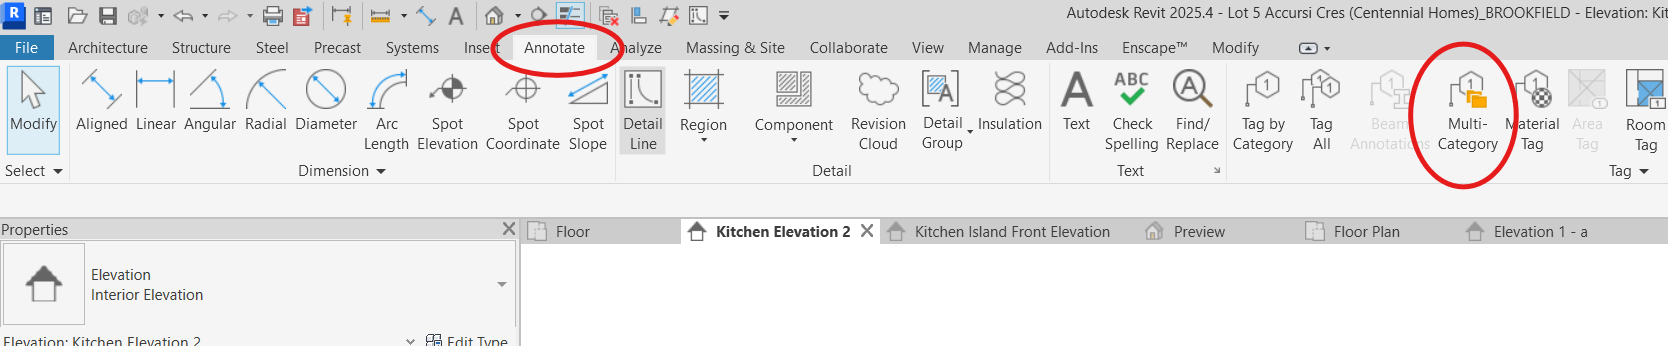
You can find these families by scrolling down in your Project Browser (Annotation Symbols > Mark Circle) OR by opening the Annotate tab at the top of the screen and choosing "Multi-Category Tag."
OR
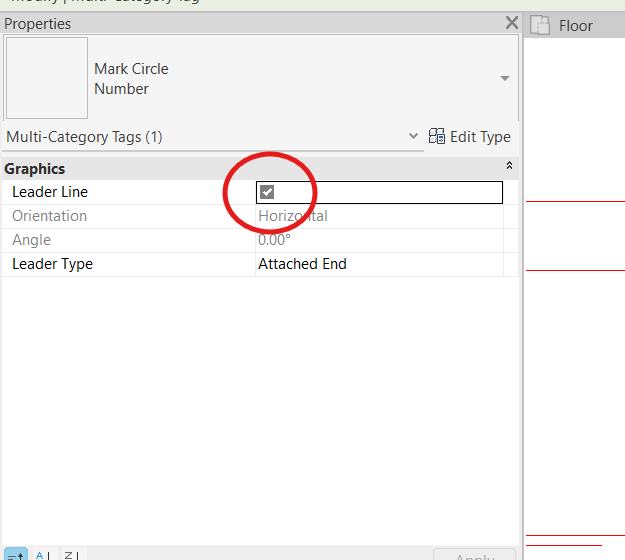
Once your Mark is selected, turn off the leader line option in the Properties Box.
Then drag and drop your Mark over an item to assign the item a mark.
IMPORTANT: Use different shaped marks for different areas that appear on the same page.
Area
Items also need an area to correctly populate your schedule. Items within the same area will upload to the same quote. Different areas will generate different quotes in Akolades.
You can see or edit the Area in column A on the schedule.
You can see and edit Area from the Properties box, under Identity Data, when you select the family.
To assign an area for the first time, just type it either on Column A of the schedule or in the Area field in your Properties browser.

Once you’ve used an Area name once, it will appear on a dropdown menu on both the Schedule and the Identity Data > Area field.
Export Schedule From Revit
Once all your items appear on your schedule, you need to export and save your schedule as an .xls (Excel spreadsheet).
Open your Schedule in Revit by double clicking in the Project Browser. Ensure the date on your schedule name matches the date on the schedule on the downloads page.
Click FILE > EXPORT, hover over the arrow to scroll down until you see REPORTS > SCHEDULE. Note that this option will be grey unless you have the schedule open on your screen.
Save the schedule to your computer, ideally with your other project files and somewhere you will be able to find it easily.
Click ‘ok’ on this prompt. DO NOT change any settings. Now you’re ready to upload.
Upload Your Schedule to Akolades
Sign into Akolades. Click on 'Quotes' tab.

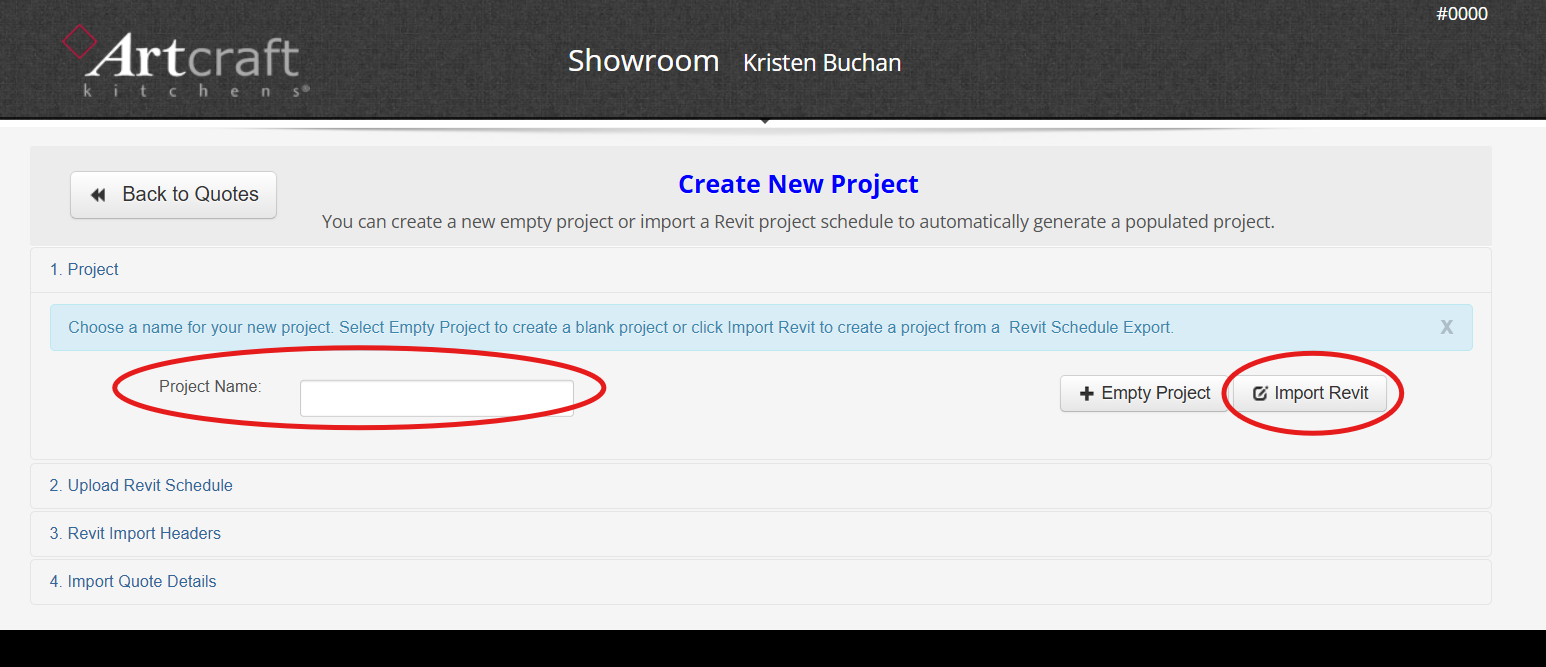
Select your name from the drop down. Then click the New Project button.

Name your project and then click the 'Import Revit' button.
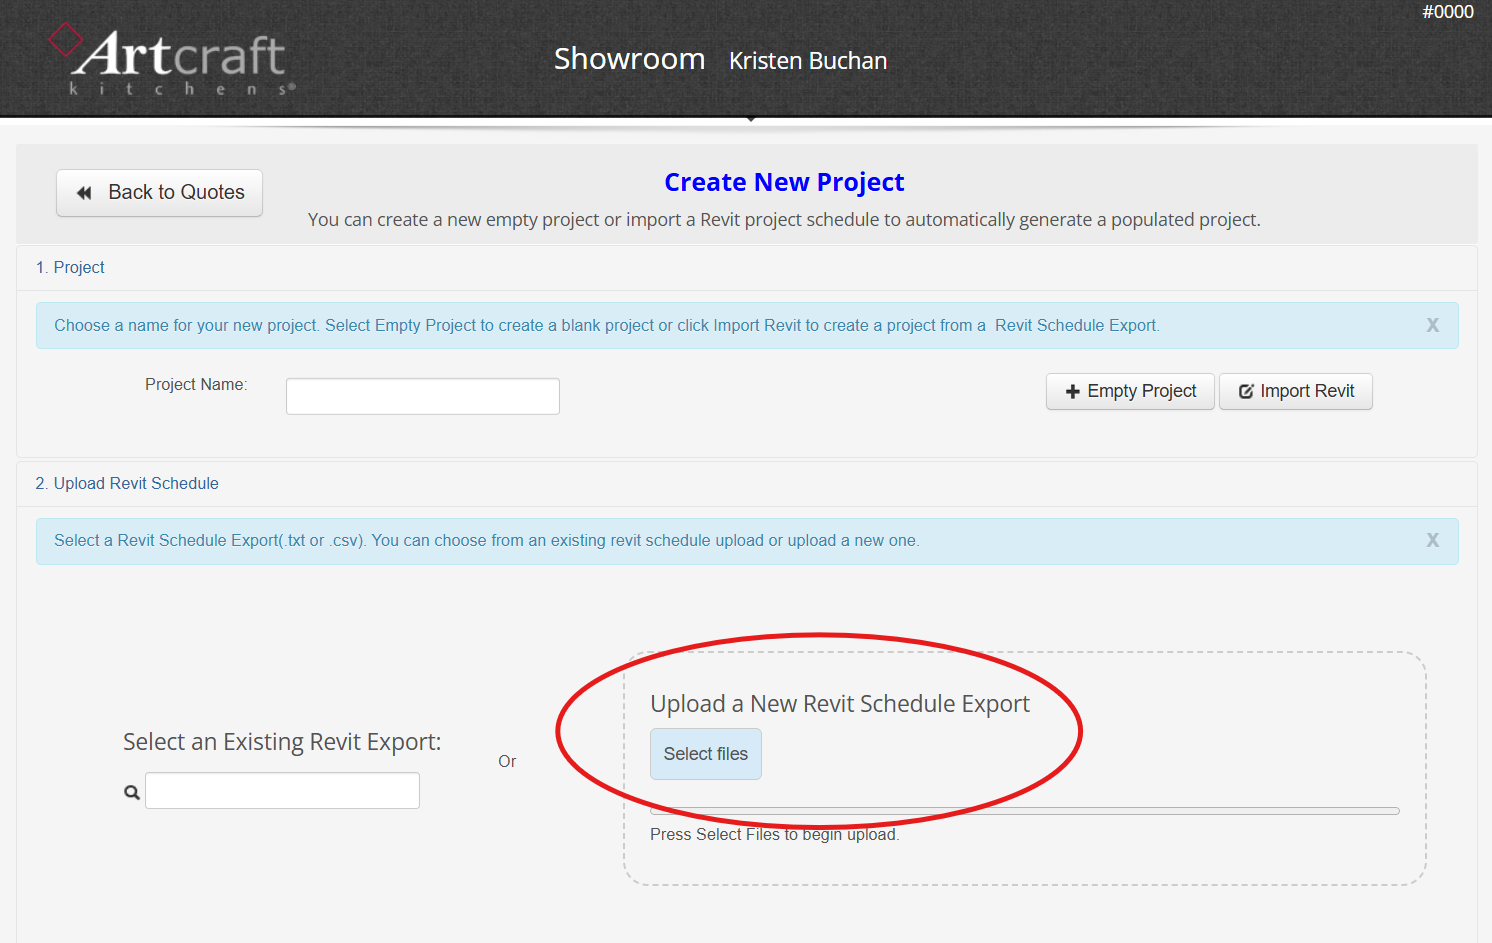
Click 'Select Files' and find the Excel file version of your Schedule that you just saved.
Your upload will say complete. Now you can enter header fields. These will apply to all generated quotes within the project.
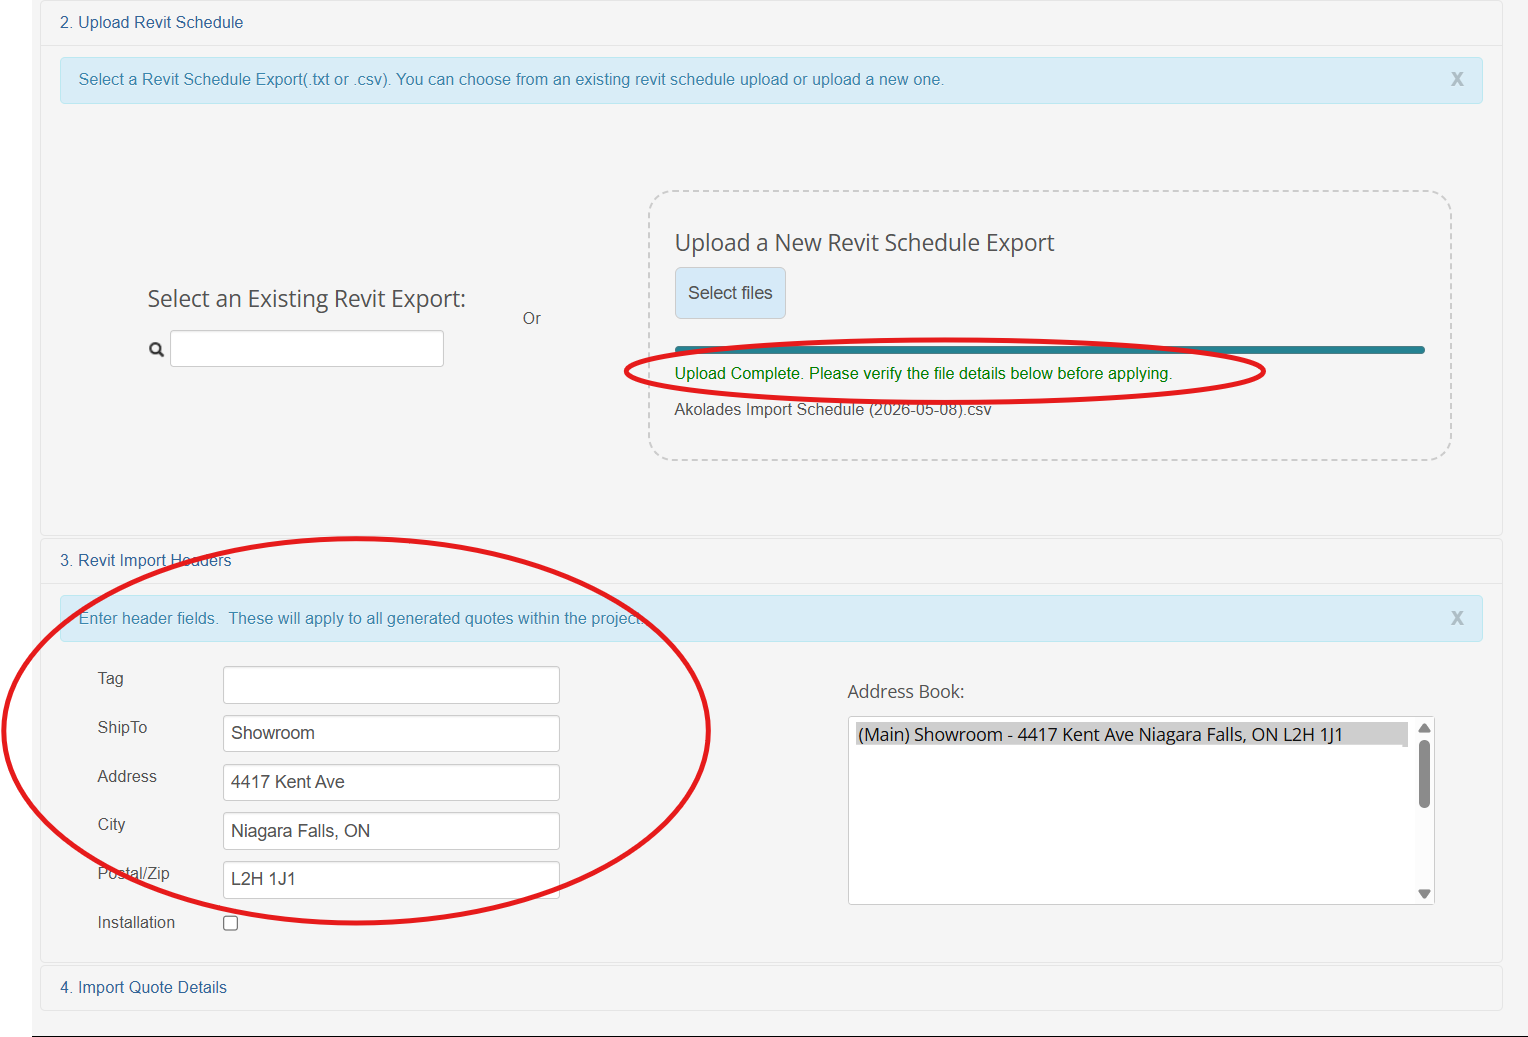
Each Area from your Schedule will create a different quote. Specify the details for each. If they are all the same, you can use the "Copy Selections to All" Option.
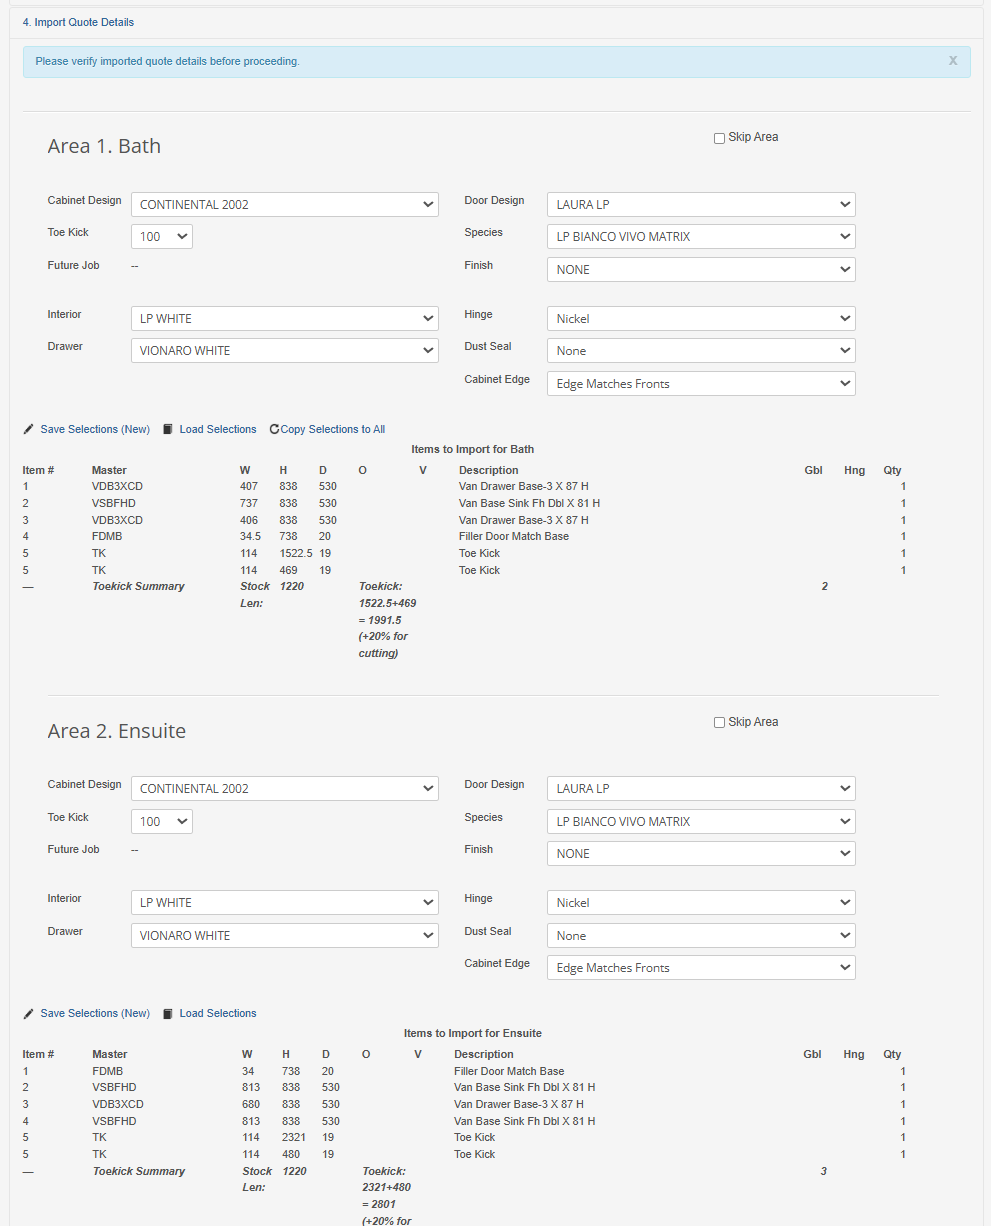
A preview of your items in each area will appear. Please verify imported quote details before proceeding.
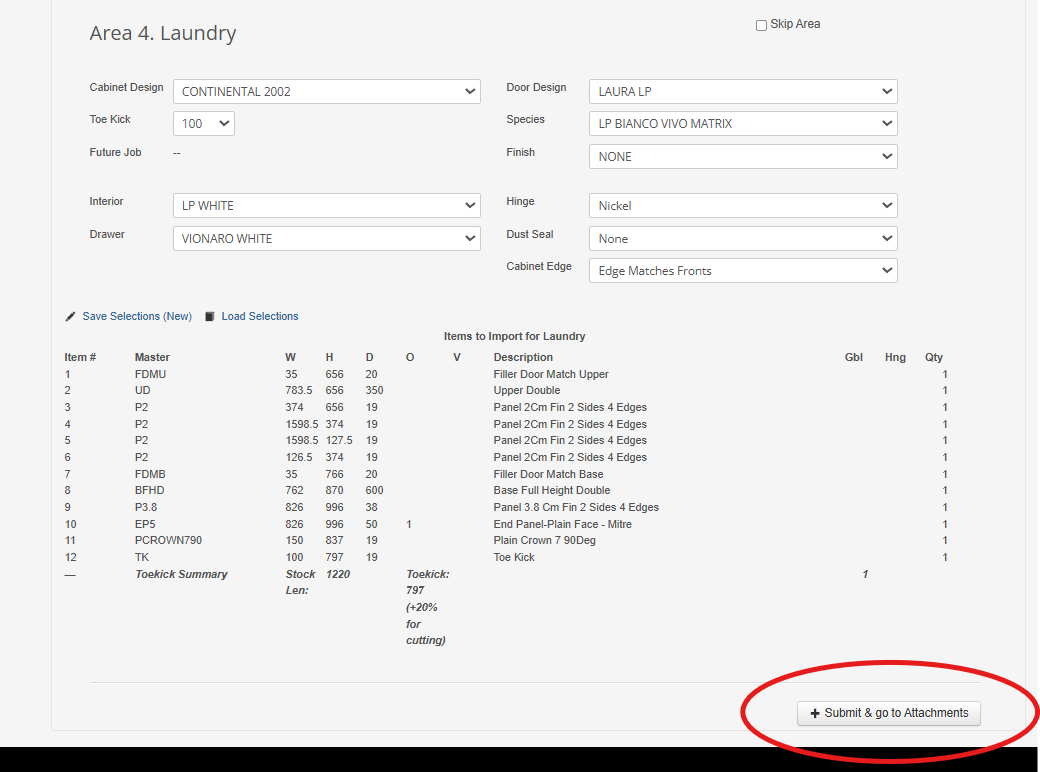
Click the "Submit & go to Attachments" button to proceed.
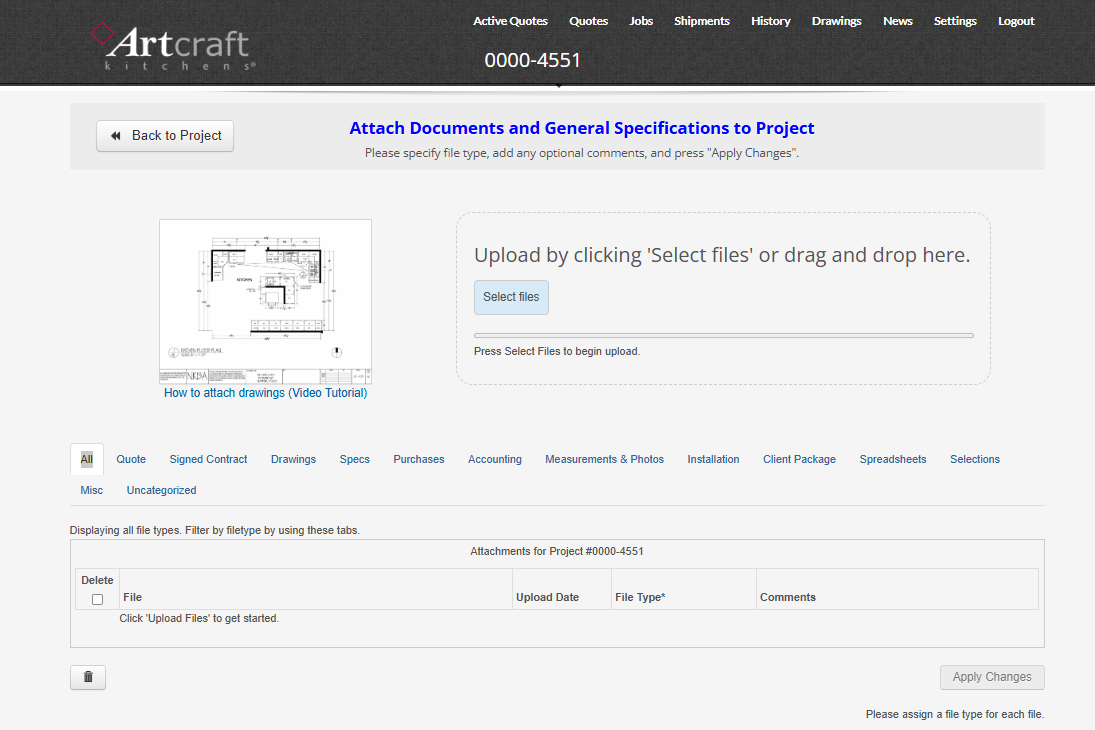
Attach Documents to Project
You can attach documents to your project.
This can include quotes, signed contracts, drawings, specs, accounting, client packages.
Please specify file type, add any optional comments, and press "Apply Changes"
To proceed, click the "Back to Project" button.
Adjust Quotes in Akolades
Your Revit Schedule has now created an Akolades Project which is comprised of a series of quotes.
Status will say "Pending Import" at first, show a loading bar, and then "Complete" when done.
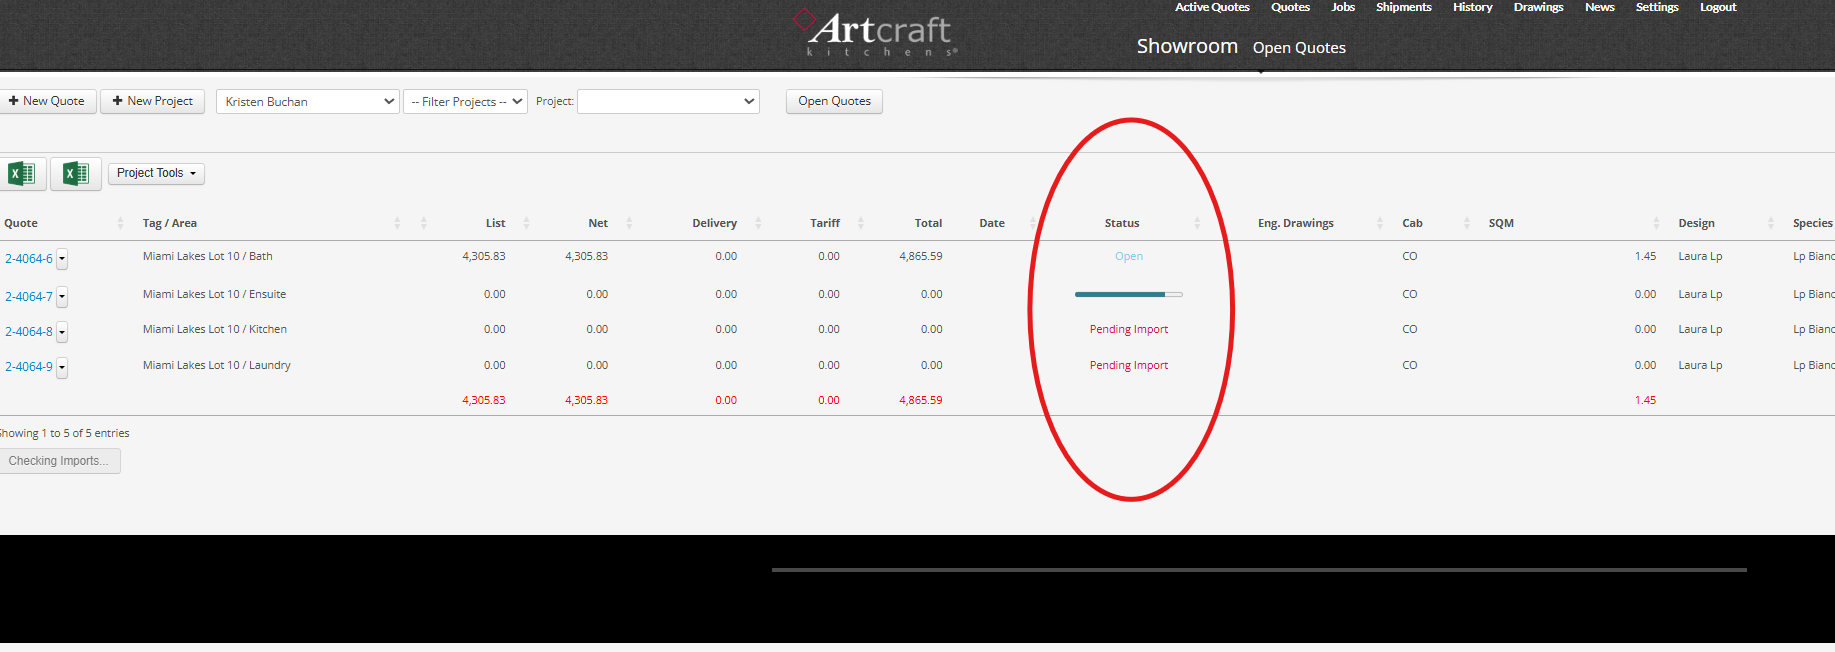
Once complete, you can enter each quote and edit as with any quote in Akolades.
Please be sure to verify all dimensions.
You can now make any changes you wish, add options and comments as needed.